 1. Instalezi Centos 8 pe o masina virtuala sau pe una fizica. (recomand virtualbox pentru ca hyper-v face figuri de ceva vreme cu placa de retea) 2. Instalezi baza de date cu urmatoarele comenzi: # sudo dnf -y install @mysql # sudo systemctl enable mysqld.service # sudo systemctl start mysqld.service # sudo systemctl status mysqld.service Daca totul este ok o sa arate ca mai jos. ● mysqld.service - MySQL 8.0 database server Loaded: loaded (/usr/lib/systemd/system/mysqld.service; enabled; vendor preset: disabled) Active: active (running) since Tue 2020-06-01 04:43:13 UTC; 22s ago Main PID: 16666 (mysqld) Status: "Server is operational" Tasks: 39 (limit: 17963) Memory: 534.9M CGroup: /system.slice/mysqld.service └─16666 /usr/libexec/mysqld --basedir=/usr Feb 25 04:43:04 tecadmin systemd[1]: Starting MySQL 8.0 database server... Feb 25 04:43:04 tecadmin mysql-prepare-db-dir[16582]: Initializing MySQL database Feb 25 04:43:13 tecadmin systemd[1]: Started MySQL 8.0 database server. Cu comanda de mai jos parolam baza de date. # sudo mysql_secure_installation Alege ca nivel de securitate 0 = LOW pentru ca daca alegi 2 o sa trebuiasca sa pui o parola foarte lunga cam de 50 de caractere sau mai mult :). Press y|Y for Yes, any other key for No: y Please enter 0 = LOW, 1 = MEDIUM and 2 = STRONG: 2 New password: [ENTER STRONG PASSWORD HERE] Re-enter new password: RE ENTER PASSWORD HERE Do you wish to continue with the password provided?(Press y|Y for Yes, any other key for No) : y Remove anonymous users? (Press y|Y for Yes, any other key for No) : y Disallow root login remotely? (Press y|Y for Yes, any other key for No) : y Remove test database and access to it? (Press y|Y for Yes, any other key for No) : y Reload privilege tables now? (Press y|Y for Yes, any other key for No) : y 3. Instalezi Apache si PhpMyAdmin cu urmatoarele comenzi: # sudo dnf install httpd wget unzip # sudo dnf install php php-pdo php-pecl-zip php-json php-mbstring php-mysqlnd # sudo systemctl enable httpd.service # sudo systemctl start httpd.service # wget https://files.phpmyadmin.net/phpMyAdmin/5.0.1/phpMyAdmin-5.0.1-all-languages.zip # unzip phpMyAdmin-5.0.1-all-languages.zip # mv phpMyAdmin-5.0.1-all-languages /usr/share/phpmyadmin # mkdir /usr/share/phpmyadmin/tmp # chown -R apache:apache /usr/share/phpmyadmin # chmod 777 /usr/share/phpmyadmin/tmp Deschizi phpmyadmin.conf cu urmatoare comanda: # chcon -Rv –type=httpd_sys_content_t /usr/share/phpmyadmin/* # systemctl restart httpd.service Setari de firewall # sudo firewall-cmd –permanent –add-service=http # sudo firewall-cmd –reload # vi /etc/httpd/conf.d/phpmyadmin.conf Si copiezi textul de mai jos acolo: Alias /phpmyadmin /usr/share/phpmyadmin <Directory /usr/share/phpmyadmin/> AddDefaultCharset UTF-8 <IfModule mod_authz_core.c> # Apache 2.4 <RequireAny> Require all granted </RequireAny> </IfModule> </Directory> <Directory /usr/share/phpmyadmin/setup/> <IfModule mod_authz_core.c> # Apache 2.4 <RequireAny> Require all granted </RequireAny> </IfModule> </Directory> Apesi pe butonul ESC si apoi scrii :wq si apesi butonul Enter. Setezi permisiunile corecte pe folder cu urmatoarele comenzi: # chcon -Rv –type=httpd_sys_content_t /usr/share/phpmyadmin/* # systemctl restart httpd.service Setari de firewall # sudo firewall-cmd --permanent --add-service=http # sudo firewall-cmd --reload Accesam PhpMyAdmin cu orice browser : http://ip-ul-serverului-tau/phpmyadmin Ca asa afli ip-ul serverului tau in CentOS scrii in consola urmatoarea comanda: # ip addr Va arata de forma 192.168.1.240 asa ca accesezi phpmyadmin asa: Za end
0 Comments
 Ca sa blocam o anumita tasta in cazul de fata vom face test pe tasta print screen avem nevoie de programul SharpKeys care poate fi descarcat de aici. 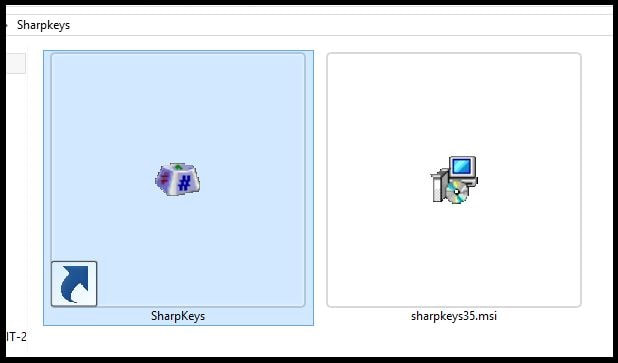 Se va descarca sharpkeys35.msi si il instalam cu Next, Next, Finish. 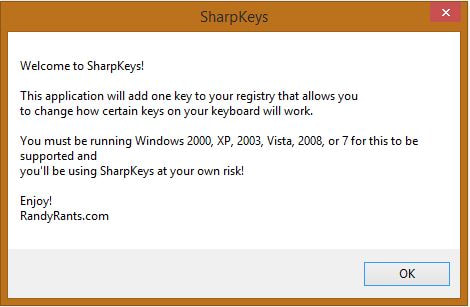 Dupa pornire va arata urmatorul mesaj si apasam butonul OK. 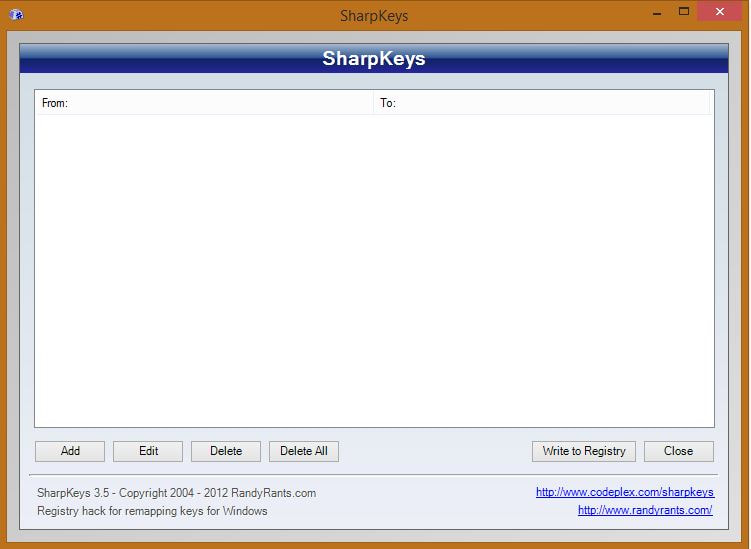 In urmatorea fereastra apasam butonul Add.  Aici alegem ce buton vrem sa dezactivam sau sa schimbam in cazul meu am ales Print Screen. 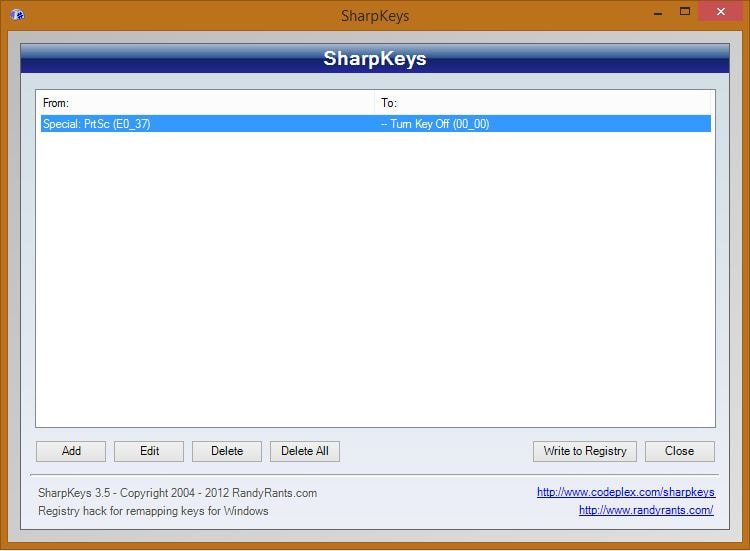 Dupa editare apare fereatra de mai jos cu lista tastelor oprite sau mutate. Ca sa activam aceasta lista apasam butonul Write to Registry. 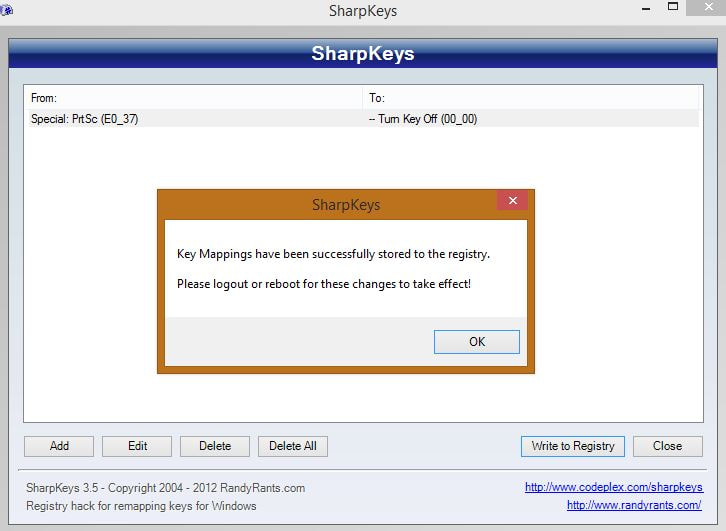 Daca totul a fost setat corect va aparea urmatorul mesaj. Se reporneste sistemul si butoanele se vor activa. Testat pe Windows 7 Profesional si Windows 8 Profesional.
|
 RSS Feed
